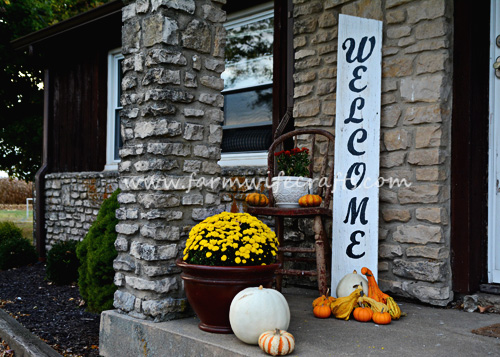
Growing up I always remember my grandma regularly sweeping her front porch and it was usually spotless. Her motto, “The front porch is the first impression of people get of your house when they visit, so keep it clean.” Now I don’t keep my porches as clean as my grandma, but I’m trying to do a better job. It’s hard to keep up with all the leaves this time of year. Brad laughs every time I get the broom out to sweep my front porch. We rarely use our front door. The girls go out it every morning to get on the bus, but other than that it hardly ever gets used. Anyone who is familiar to our house uses the back door, but the front porch is the first thing you see when you pull into our drive, so I decided I wanted to dress it up a little and make it more welcoming;) So, I created this DIY Welcome Porch Sign.
DIY Welcome Porch Sign
You can use any type of wood you would like for the board. I prefer something old and rustic that has a story, so I used a piece of barn wood that my in-laws had in their barn.
For this project you will need:
A long board (The dimensions of the one I used were 5 feet long X 8 inches wide X 1 inch deep, 5 inch stencil letters, white acrylic paint, black acrylic paint, sandpaper (optional), clear acrylic sealer.
The first step is to sand down the board and remove any rough spots if needed. After sanding, clean the board well with a wet rag and allow it to dry completely. Then paint the board with white paint. I made two coats, but you can do more or less. Whatever suits your fancy just make sure you let it dry in between coats.
Now the fun part, sanding! I like a little more rustic feel, like I said above so I sanded mine a little to preserve that barn wood feel. Some people like a crisp white finish, so the sanding is of course optional;) If you do choose to sand the board, wipe it clean with a wet cloth.
Now it’s time to add the stencil letters. I trimmed some of the edges off the stencil to get them to fit. Sorry, I didn’t include a picture of me adding the stencils. I forgot to snap one.
I also filled in the space on the letters because I didn’t care for the “stencil look” on my sign. You will have to measure to make sure the letters are centered and such. I’m not including those measurements because the sizes of the board you all choose could be different.
Once the black paint is dry, spray the board with acrylic sealer. I did two coats…two coats always makes me feel better;) Once the sealer is dry, display it where ever you please!
I love how warm and welcoming this sign and the fall decor make my front porch look.
Welcome Porch Sign
Ingredients
- 1 long board about 5 ft long X 8 inches wide X 1 inch deep
- 5 inch stencil letters
- white acrylic paint
- black acrylic paint
- sandpaper optional
- clear acrylic sealer
Instructions
- Paint board white and allow to dry between coats. Let dry.
- Sand white paint if desired.
- With black paint, add the stencil letters.
- Allow to dry completely.
- Spray with acrylic sealer and allow to dry completely.

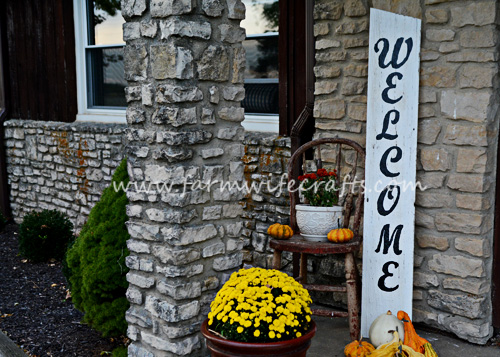





Not sure if I like the font used.
Everyone’s style is different, Kate. This is the sign I did for my front porch. The nice part about DIY is you can personalize it to fit your style. I hope you find a font that you like as much as I like the one I used. Enjoy the weekend!